1. GitHub 가입/로그인
- 링크 : https://github.com/
Build software better, together
GitHub is where people build software. More than 31 million people use GitHub to discover, fork, and contribute to over 100 million projects.
github.com
2. Repository 만들기
1. [Start a project] 클릭
2. Repository name : elecs7g.github.io
- Repository name에 ".github.io"를 붙여야 하며 Owner name과 같게 해주는 것이 좋다.
3. [Create repository] 클릭
3. GitHub Desktop
1. [Set up in Desktop] 클릭으로 GitHub Desktop 실행
2. [File] > [Options...]에서 GitHub 로그인 -> 이미 로그인 되어 있으면 스킵
3. [File] > [Clone repository...] > URL > Local path : D:\Work\GitHub\elecs7g.github.io 확인 후 [Clone] 클릭
4. Theme 적용하기
1. Jekyll Theme에서 적당한 GitHub Pages 용 테마를 다운로드한다. (Documentation Theme for Jekyll)
Documentation Theme for Jekyll
jekyllthemes.org
2. 다운로드한 테마를 D:\Work\GitHub\elecs7g.github.io 폴더에 풀어준다.
3. GitHub Desktop으로 돌아가면 Changes 탭에 변경된 파일들이 보인다.
>git status
4. Summary (required)에 적당한 코멘트를 입력하고 [Commit to master] 클릭
>git commit -m "Documentation Theme for Jekyll"
5. 업로딩이 진행된 후 [Publish branch] 클릭
>git remote add origin https://github.com/elecs7g/elecs7g.github.io
>git push -u origin master
5. GitHub Pages 접속하기
1. GitHub 내의 Repository elecs7g/elecs7g.github.io(https://github.com/elecs7g/elecs7g.github.io)에 접속해 [Settings] 클릭
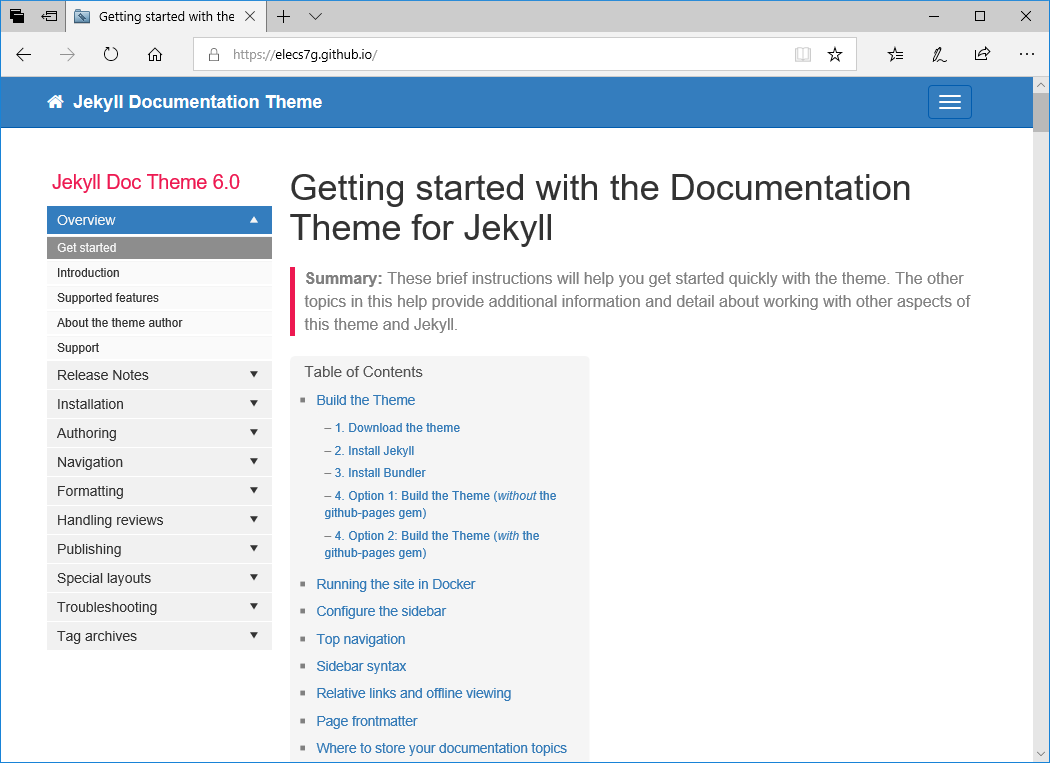
2. 아래로 스크롤 해서 GitHub Pages > Your site is published at http://elecs7g.github.io/ 확인하고 접속한다.
3. 짜잔~ 아래와 같이 나의 GitHub Pages 초기 화면이 뜬다.
# Git 명령어
- Git은 DVCS(분산 버전 관리 시스템)로 자신의 컴퓨터에 Git Repository만 만들면 Git 서버 없이 오프라인의 로컬 상에서도 작업이 가능하다 (CVCS는 서버에서 클라이언트로 Checkout 해서 작업한 후에 다시 서버로 Commit 하는 방식)
1. 저장소 초기화
# 해당 폴더 안에 .git 폴더 생성되며 현재 Working Directory에서 Git을 사용할 수 있도록 함
C:\myproj>git init
2. 저장소 설정 (대부분 따로 설정할 필요 없음)
C:\myproj>git config --list
core.symlink=false
...
core.ignorecase=true
C:\myproj>git config user.name "Junhong Kim"
C:\myproj>git config user.email "elecs7g@gmail.com"
C:\myproj>git config user.name
Junhong Kim
C:\myproj>git config user.email
elecs7g@gmail.com
# 저장소 만 아니라 계정 전체에 설정을 적용하려면 --global 옵션을 사용
C:\myproj>git config --global user.name "elecs7g"
3. Working Directory에서 Staging Area에 올리고 Commit 하기
# 현재 Branch 상태와 Working Directory, Staging Area 상태를 알려줌
C:\myproj>git status
C:\myproj>notepad test.txt
C:\myproj>git status
# Untracked files에 test.txt 생김 (Working Directory에는 있지만 Staging Area에는 올라가지 않은 파일을 의미)
# test.txt를 Staging Area에 올려놓음
C:\myproj>git add test.txt
# test.txt를 Staging Area에서 내려놓음
C:\myproj>git rm --cached test.txt
# Working Directory의 모든 새로운 파일 또는 수정된 파일들을 Staging Area에 올려놓음
C:\myproj>git add --all
# Staging Area의 모든 새로운 파일 또는 수정된 파일들을 Git Repository(?)에 올려놓음
C:\myproj>git commit -m "commit message"
# Working Directory와 Staging Area의 차이를 보기
C:\myproj>git diff
# Staging Area와 Git Repository(?)의 차이를 보기
C:\myproj>git diff --cached
# 지금까지 Commit 한 기록 보기
C:\myproj>git log
# git log에서 보여주는 Commit 중 특정 Commit의 해시값을 적어주면 그 Commit 한 시점으로 되돌아간다.
C:\myproj>git checkout <해시값>
# 이 기능은 Branch로 대체
4. 원격 저장소 GitHub에 저장
# 원격 저장소 주소(https://github.com/elecs7g/myproj.git)를 origin이라는 이름으로 등록
C:\myproj>git remote add origin https://github.com/elecs7g/myproj.git
# origin이라는 원격 저장소에 mater branch로 push
# (-u를 쓰면 다음부터는 git push만 입력해도 origin의 master로 push)
C:\myproj>git push -u origin master
5. 기타
# 클라이언트로 내려받음
C:\myproj>git pull origin master
# 명령어 pull과 비슷하지만 클라이언트 상에 아무것도 없을 때 서버의 프로젝트를 내려받음 (자동으로 init 수행 )
C:\myproj>git clone [저장소 주소]
* GitHub에서 헷갈리는 부분들 정리 :
Workin Directory는 내 컴퓨터에서의 작업 폴더를 의미하며, 이후로 Index(Staging)와 Head라는 두 가지의 상태가 더 있다.
add 명령어로 Index를 만들고 commit 명령어로 Index에 있는 파일들에 Comment를 설정하여 Head를 만든다.
그리고 마지막으로 push 명령어를 통해서 원격 서버로 보낸다.
# 참조
GitHub : Github 간편 사용 설명서 / Git Handbook / Git Cheat Sheets / Learning Git Branching
GitHub Pages : 블로그 시작하기 / Site


